Sep 29, 2026



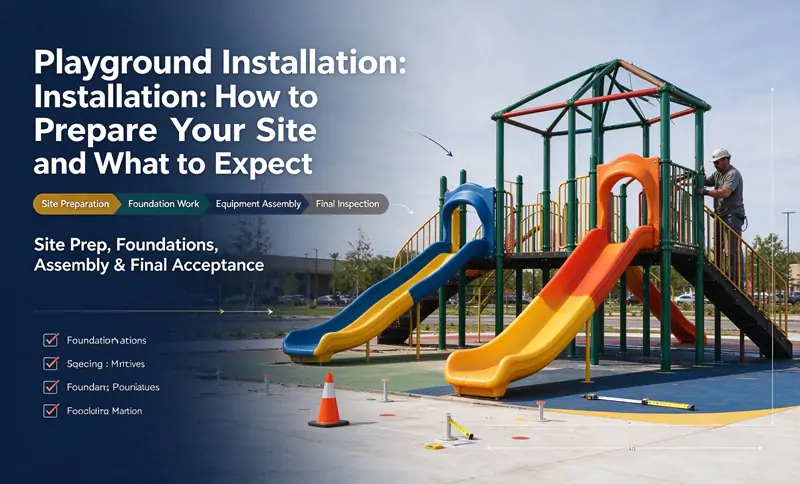
Playground installation begins long before the delivery truck arrives. The quality of site preparation directly affects installation time, safety compliance, and the long-term durability of the playground equipment. Buyers who prepare properly can reduce installation time, avoid unexpected costs, and ensure that the finished playground passes safety inspection. This guide covers the four phases of playground installation: site preparation, foundation work, equipment assembly, and final acceptance—with a practical checklist for each stage.
Site preparation is the foundation of a successful playground project. Poor preparation leads to:
The most common mistake buyers make is assuming that site preparation is simple. In reality, it involves several distinct tasks that must be completed before the installation crew arrives.
Site preparation includes all the work needed to make the ground ready for installation. This phase typically takes 1–3 weeks depending on site conditions.
Key tasks:
Common mistakes:
For buyers working with Huaxia, the service team can provide site preparation guidance based on the specific equipment configuration and local conditions.
Foundations anchor the equipment to the ground and ensure structural stability. The type of foundation depends on the equipment design, soil conditions, and local frost depth.
Foundation types:
| Foundation Type | Suitable For | Key Considerations |
|---|---|---|
| Concrete footings | Most permanent installations | Requires curing time (typically 3–7 days) before equipment assembly; must be below frost line in cold climates |
| Ground sleeves | Temporary or relocatable installations | Faster installation; less stable for tall structures |
| Surface-mounted bases | Hard surfaces (concrete, asphalt) | No digging required; suitable for rooftop or indoor installations |
| Screw anchors | Sandy or loose soils | Fast installation; load capacity varies by soil type |
Key tasks:
What to expect during this phase:
This is the phase most buyers think of as "installation." It involves assembling the equipment components, anchoring them to the foundations, and verifying structural integrity.
Typical installation sequence:
Installation timeline:
For a standard playground project, installation typically takes:
These timelines assume that site preparation and foundation work are already complete.
What to expect during installation:
Huaxia's installation standards include site survey and equipment inspection before installation, precise construction and debugging during installation, and acceptance after installation, ensuring standardization and traceability. Their commercial-grade equipment is designed for efficient installation and long-term durability.
After installation is complete, a final inspection verifies that the equipment meets safety standards and functions as designed.
What to check:
Acceptance criteria:
Use this checklist to prepare for installation:
Before Installation
During Installation
After Installation
Issue 1: Ground not ready when crew arrives.
This is the most common cause of installation delays. Solution: Complete site preparation and foundation work at least 3–5 days before the installation crew is scheduled to arrive.
Issue 2: Missing or damaged components.
Components can be damaged in transit or missing from the shipment. Solution: Inspect all components immediately upon delivery. Report any issues before the installation crew arrives.
Issue 3: Drainage problems discovered after installation.
Standing water around foundations leads to long-term problems. Solution: Verify drainage before installation begins. If drainage issues are discovered later, address them immediately.
Issue 4: Fall zone clearance insufficient.
Safety standards require specific clearance distances around equipment. Solution: Verify fall zone requirements during site preparation, not after installation.
Issue 5: Surfacing depth incorrect.
Impact-absorbing surfacing must be installed to the correct depth for the equipment's critical fall height. Solution: Measure surfacing depth during installation and adjust before final acceptance.
Installation time depends on project size and complexity. A small playground with a single structure may take 1–3 days. A medium playground with multiple components typically takes 3–7 days. Large or custom projects may take 1–3 weeks. These timelines assume site preparation and foundation work are already complete.
Some buyers handle basic assembly tasks with supplier support and documentation. However, structural anchoring, foundation work, and safety verification should be performed by qualified professionals. Improper installation can void warranties and create safety hazards.
The foundation type depends on equipment design, soil conditions, and climate. Concrete footings are standard for permanent installations. Ground sleeves are suitable for relocatable equipment. Surface-mounted bases are used on hard surfaces. Your equipment supplier should provide foundation specifications based on the specific product.
Surfacing depth depends on the critical fall height of the equipment. Your supplier should provide the required depth specification. For example, equipment with a 2-meter fall height may require 30 cm of engineered wood fiber or a specific thickness of rubber tiles. Verify surfacing depth during installation and before final acceptance.
If the site is not ready, the installation crew may not be able to proceed. This can result in additional costs for crew standby time and rescheduling. To avoid this, complete all site preparation and foundation work at least 3–5 days before the scheduled installation date.
After installation, you should receive installation certification, warranty documents, maintenance guidelines, and as-built drawings if applicable. These documents are important for future maintenance, warranty claims, and safety inspections.
Playground installation is a multi-phase process that requires careful preparation. Site preparation, foundation work, equipment assembly, and final inspection each play a critical role in the project's success.
The most important principle is to prepare thoroughly before the installation crew arrives. Complete site preparation and foundation work in advance, verify that all components are received and inspected, and confirm that the site is accessible. This reduces installation time, avoids unexpected costs, and ensures that the finished playground meets safety standards.
For buyers preparing for installation, review Huaxia's commercial-grade equipment specifications or explore completed projects for reference. For project-specific guidance, contact the team to discuss your site conditions and installation requirements.
Enter Your E-Mail


Yangwan Industrial Park, Qiaoxia, Yong Jia, Wenzhou, Zhejiang, China