Jul 15, 2026


A visit to a well-used playground often reveals a quieter story about who isn't there. A toddler clings to a parent at the edge of a busy structure, unsure where to start. A grandparent sits on a distant bench because no comfortable seat exists near the action. A child in a wheelchair watches others climb, the wood-chip surface an impassable barrier. These moments aren't failures of intention—most parks genuinely aim to serve everyone. There are gaps in the process.
Creating an inclusive play space isn't about buying a specific piece of equipment. It's about rethinking how we design, who we involve, and what we measure as success. This guide walks through a structured approach that parks departments, school boards, landscape architects, and community groups can adapt to their own projects. The focus is on principles and practical steps—things you can do before a single catalogue is opened.
What follows is grounded in widely adopted safety standards and design practices. Where possible, references to ASTM International, the European Committee for Standardisation (CEN), the U.S. Consumer Product Safety Commission (CPSC), and the National Recreation and Park Association (NRPA) provide benchmarks you can verify and apply.
The most valuable design data often doesn't come from a survey or a focus group. It comes from sitting at the edge of an existing playground—or a comparable site—and watching.
Spend time on three different occasions: a weekday morning when caregivers with young children are typically present, a weekend afternoon when the crowd shifts, and an early evening when older kids might drift in. Note not just who comes, but who stays. Who turns back after two minutes? Who watches from the car? Who tries to follow a sibling but can't navigate the surface?
Look for patterns like these:
Caregivers lifting strollers over curbs or abandoning them in the grass.
Children with visible disabilities remain on the perimeter.
Older adults stand while younger parents sit because there aren't enough seats.
Toddlers repeatedly falling on uneven wood chips.
A group of teenagers hanging around the edges, clearly wanting something to do but finding nothing designed for them.
These observations aren't rigorous research, but they ground the design process in real, local behaviour. They prevent the common mistake of copying a "successful" layout from another town without understanding why it worked there.
One frequent finding is that loose-fill surfaces—engineered wood fibre, sand, pea gravel—create the most immediate exclusion. Even when compacted to meet ADA guidelines at installation, these materials shift with weather and use. Wheelchair users find themselves stuck. Walkers and canes sink. The surface becomes a barrier before anyone reaches a slide or swing. Recognising this early shifts budget conversations from "can we afford unitary surfacing?" to "can we afford a surface that doesn't exclude people from day one?"
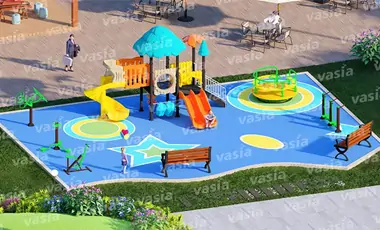
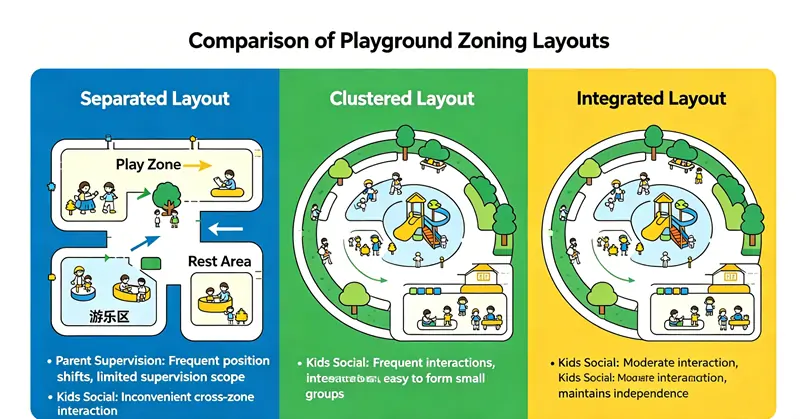
Traditional playgrounds are often segregated by age. The toddler area sits in one corner, the big-kid structure in another, swings somewhere in between. This forces families with children of different ages to split up. More often, the whole group stays in the youngest child's zone while older siblings grow restless.
A more cohesive model uses a central hub with distinct activity zones radiating outward. The hub is a shaded, welcoming space with seating, drinking water, and clear sightlines into every play area. It's not the centre of the action—it's the anchor that allows people to join the action on their own terms.
From the hub, paths lead to zones defined by energy level and play type:
A sensory garden with tactile panels, musical instruments, and fragrant plants.
An active climbing and sliding structure with multiple entry points.
A fitness cluster with equipment suitable for teens and adults.
A quiet retreat with small, semi-enclosed spaces and natural shade.
This layout offers several practical advantages:
Families enter together and can spread out while staying visually connected. A parent can watch a toddler in the sensory zone and an older child on the climbing structure at the same time.
People who need a break can move back to the hub without leaving the playground entirely.
The transition between zones can be marked with colour changes on the ground or textured paths, which help people with visual impairments or cognitive disabilities navigate independently.
Emergency access is simpler: clear pathways from the hub to every zone mean first responders can reach any part of the playground quickly.
Within each zone, aim for graduated challenges rather than a single difficulty level. In a balanced area, this means offering a wide, ground-level beam, a slightly elevated wobble bridge, and a more advanced overhead traverse nearby. Different skill levels can play side by side, and no one is shunted off to a separate area because the "easy" equipment is elsewhere.
This concept aligns with universal design principles promoted by the Centre for Universal Design at North Carolina State University. The goal is environments usable by all people, to the greatest extent possible, without the need for adaptation or specialised design. When applied to playgrounds, it means a child who uses a wheelchair and a child who doesn't should be able to access the same platform and find engaging activities there.
Material selection directly determines who can use the playground and for how many years. Two material categories—surfacing and structural components—deserve the most attention.
Surfacing: The Foundation of Access
Loose-fill materials like engineered wood fibre (EWF), sand, and pea gravel are common because of lower upfront cost. But their performance as an accessible surface requires constant, labour-intensive maintenance. EWF must be raked weekly, topped off annually, and kept at a minimum depth of 12 inches in fall zones for equipment up to 8 feet high, per CPSC recommendations. Even with diligent care, loose fill degrades over time. Heavy rain compacts it, wind scatters it, and continuous foot traffic creates ruts.
Unitary surfaces—poured-in-place (PIP) rubber and interlocking rubber tiles—offer a seamless, slip-resistant surface that wheelchair users can traverse independently. PIP consists of a base layer of recycled rubber granules bound with polyurethane, topped with a colored wear layer. The initial cost is higher, but maintenance is significantly lower over the equipment's lifespan. Minor cracks can be patched with liquid repair kits, and full resurfacing is typically needed every 10 to 15 years. For projects with long-term funding, the lifecycle cost comparison often favours unitary surfaces.
When evaluating surfacing, ASTM F1951 provides a method for determining surface system accessibility under wheelchair traffic. ASTM F1292 governs impact attenuation—essentially, how well the surface absorbs a fall from a given height. Ask manufacturers for test reports from ISO 17025-accredited labs that show compliance with these standards for the specific fall heights in your design.
Structural Materials: Galvanised Steel and HDPE
For the equipment itself, hot-dip galvanised steel and high-density polyethene (HDPE) are widely specified for public playgrounds. Galvanised steel with a zinc coating of 80–100 microns resists rust for decades, even in coastal or high-humidity environments. It handles the high structural loads that ramps, transfer platforms, and elevated decks require.
HDPE panels bring colour and texture while staying cooler to the touch than metal on hot days. Look for panels formulated with UV stabilisers and tested to ASTM G154 for accelerated weathering—2,000 hours or more of laboratory exposure is a commonly referenced benchmark for long-term colour and structural stability. Panels that fade or chalk within five years likely lack sufficient UV protection.
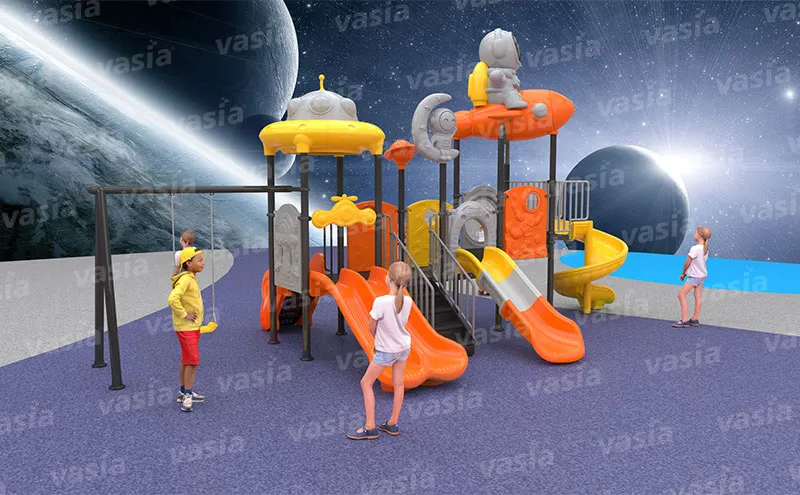
For those ready to move beyond general research and into specification, it can help to review how material choices play out in real installations. See detailed material specifications and configuration examples. This type of documentation can clarify what's possible within a given budget and climate.
Playground safety isn't a final inspection step. It's a parameter that shapes decisions about surfacing depth, guardrail height, fastener design, and clearance zones. Two standards form the foundation: ASTM F1487 in the United States and EN 1176 in Europe. Both address impact attenuation, head and neck entrapment, protrusions, and structural integrity.
Key concepts to understand when reviewing designs or equipment specifications:
Impact Attenuation and HIC
The Head Injury Criterion (HIC) must not exceed 1000, as measured from the highest accessible point on the structure. This is tested by dropping an instrumented headform onto the installed surfacing and recording deceleration. Generic data from a manufacturer's catalogue isn't sufficient; ask for test reports tied to the specific fall height and surface configuration in your plan.
Entrapment Hazards
Openings between roughly 3.5 and 9 inches can trap a child's head while allowing their body to pass through. Guardrail spacing, rung ladders, and net openings must all be tested with the appropriate probe devices defined by the standard. This is one of the most common compliance issues found in older playgrounds.
Protrusions and Entanglement
Any bolt, clamp, or connector that extends more than a few millimetres beyond the surrounding surface can snag clothing, drawstrings, or bike helmets. Recessed fasteners, smooth welds, and protective caps are the standard solutions. Check these details in the field—not just in the catalogue image.
Dynamic Loading
Children don't stand still on equipment. They jump, swing, and climb in groups. EN 1176 requires dynamic load testing that simulates these forces, typically at 1.5 times the static load rating. A structure that passes a static weight test can still fail under the movement of multiple children playing simultaneously.
The CPSC's Public Playground Safety Handbook (Publication #325) translates these technical requirements into practical checklists that parks departments can use during design, installation, and routine inspections. It's available free on the CPSC website and is one of the most referenced documents in the industry.
A critical practice when working with any supplier is requesting third-party certification from an ISO 17025-accredited laboratory—names like TÜV, SGS, or Intertek appear frequently. A statement that equipment "meets ASTM standards" without independent documentation doesn't offer the same level of assurance.
People process sensory input in vastly different ways. A child on the autism spectrum might find the echo inside a plastic tunnel unbearable. Another child might seek out intense motion—spinning, crashing, swinging—as a way to regulate their nervous system. A playground that offers sensory variety lets each person choose what they need.
Rather than building a separate "sensory area" off to one side, distribute different sensory experiences across the entire site. This avoids the "accessible corner" problem and gives everyone a reason to move through the whole playground.
Vestibular and Proprioceptive Input
Swings are the most common tool. Beyond traditional belt swings, consider accessible platform swings that accommodate a wheelchair or a child who needs full-body support. Group swings that face each other encourage social interaction. Ground-level spinners let children control the speed by shifting their weight, building body awareness without the risk of falling from height.
Climbing nets, overhead ring traverses, and push-through rollers provide the deep-pressure input that many children find calming. These activities engage large muscle groups and help develop coordination and body sense.
Auditory
Outdoor musical instruments—chimes, drum panels, xylophones—can be engaging, but placement matters. Position them along pathways or at the edge of the hub, not in the centre of a quiet zone. This lets people choose when to approach. Also consider how materials affect ambient noise: rubber surfacing, fabric shade sails, and vegetation all dampen sound, making the overall environment less overwhelming.
Tactile
Varying ground textures is a low-cost way to add sensory richness. A path that transitions from smooth concrete to ridged rubber to river stone provides feedback through the feet. Raised garden beds with hardy, touchable plants—rosemary, lamb's ear, ornamental grasses—invite exploration. Even different grip textures on railings and handholds add subtle variety.
Visual
Consistent colour coding helps with wayfinding. Using one colour family for paths leading to active zones and another for calm areas reduces cognitive load. Avoid visual clutter: too many bright primary colours and competing patterns can be disorienting for people with sensory sensitivities.
The Retreat Option
A small, semi-enclosed space—a tunnel nook, a shaded seat with low walls, a willow hut—gives someone who feels overwhelmed a place to regroup without having to leave the playground entirely. These retreats work best when integrated into the layout, not hidden at the perimeter. They should allow the person to observe the playground at a comfortable distance and rejoin when ready.
Conventional playground design typically targets two age bands: 2–5 and 5–12. This leaves gaps at both ends. Children under two need safe, ground-level exploration spaces. Teenagers and older adults often find nothing designed for them at all.
The Youngest Visitors (6–23 months)
Crawling tunnel-textured red panels, small mounds to clamber over, and very low slides with wide, gentle slopes provide stimulation without overstimulation. The surface must be completely smooth and impact-absorbing. Shade is essential for this age group—infants and young toddlers are more vulnerable to heat and UV exposure than older children.
Older Youth (13+)
Teenagers need social space, physical challenge, and a sense of autonomy. Parkour-style obstacles, bouldering structures, multi-use courts, and sheltered hangout spots with seating give them a reason to stay. Parks that add youth-oriented elements often see higher usage in late afternoon and early evening hours, extending the playground's value across more of the day.
Older Adults and Seniors
Integrating fitness stations with calibrated resistance—recumbent bikes, elliptical trainers, leg press machines—into the playground's perimeter allows grandparents to stay active while remaining near children. Walking paths with benches every 50 to 70 feet support people who need frequent rest. Placing adult fitness within sight of, but not directly in, the children's active play zone creates a natural intergenerational dynamic. A grandparent can exercise while keeping an eye on grandchildren; they don't have to choose between their own health and family time.
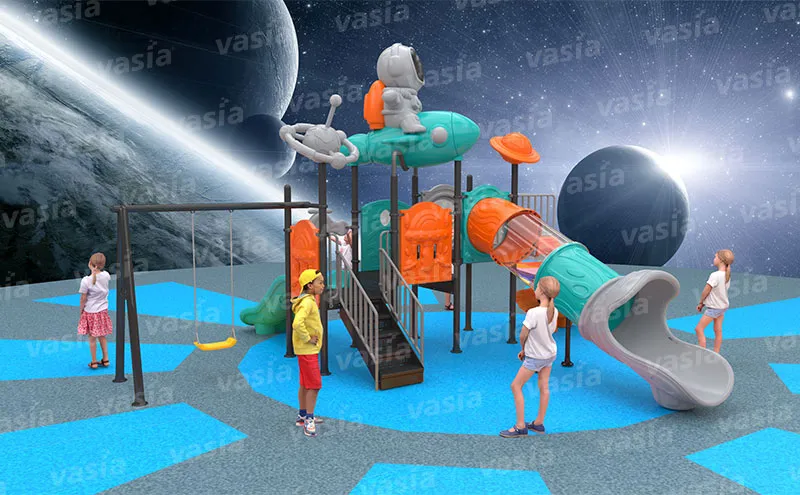
Multi-generational playgrounds have been adopted by communities in several countries. While specific metrics vary by location, the broader trend is clear: parks that welcome a wider age range attract a more diverse cross-section of residents and sustain higher year-round usage. When planning such a space, it's useful to look at how different configurations handle the mix. View examples of layouts that combine youth activities with senior fitness elements.
Inclusive design erodes quickly without consistent maintenance. A ramp develops a crack and becomes a trip hazard. A swing seat wears through and can't be used. Loose surfacing compacts into a hard crust that a wheelchair can't cross. The playground that opened with fanfare becomes an exclusionary space in just a few seasons.
Maintenance starts in the design phase. Every material choice implies a maintenance burden. Loose-fill surfaces require weekly raking, monthly depth checks, and annual top-offs. Unitary surfaces need annual inspections for cracks and drainage issues, with full resurfacing scheduled 10 to 15 years out. Galvanised steel structures should be checked semi-annually for rust at welds and connectors, especially in coastal or high-humidity areas. HDPE panels benefit from annual cleaning and a visual check for UV degradation.
Document these requirements in a site-specific maintenance manual. Assign responsibilities—municipal crew, contracted service, or trained volunteers—and build the associated costs into the operating budget from the start. Too many projects fund construction beautifully but leave maintenance as an afterthought.
Community involvement can extend the life of a playground significantly. Volunteer "park steward" programs, where residents commit to simple weekly tasks like surface raking or litter pickup, distribute the workload and create a sense of shared ownership. QR codes mounted on equipment that link directly to an online maintenance request form make reporting issues easy. When someone notices a loose bolt on a Saturday afternoon, they can flag it immediately rather than waiting until Monday and hoping someone from the parks department happens to check.
The National Recreation and Park Association (NRPA) publishes maintenance management resources that many U.S. park departments use as a benchmark. Adapting their recommended frequencies and checklists to your specific site and climate creates a defensible, systematic approach to long-term care.
Even well-intentioned projects can fall into predictable traps. Being aware of them early can save significant time and money.
The "Accessible Corner"
Placing all accessible features in one designated area—often near the parking lot—physically separates children with disabilities from the main flow of play. A ramp should lead to the highest deck, not just a low platform. An accessible swing belongs among the other swings, not alone in a distant corner.
Overlooking Microclimate Comfort
Shade, drinking water, and wind protection affect how long anyone can stay. A playground with no shade becomes effectively unusable during midday summer hours in many climates. Permanent shade structures or fabric sails should cover at least 30% of seating and active play areas.
Skipping Community Input
A top-down design process tends to produce spaces that reflect the designer's assumptions rather than the community's reality. Even informal conversations with parents, teachers, therapists, and residents can surface insights no survey captures. Involving people with disabilities in the design process isn't just good practice—it's essential to getting the details right.
Choosing Materials on Upfront Cost Alone
A surface that costs less to install but fails to provide wheelchair access after a year of use is not less expensive. Lifecycle cost analysis—including maintenance labour replacement intervals and the cost of downtime or early replacement—tells a different story from the initial quote. Run the numbers over 15 years, not just the opening day budget.
Forgetting the Journey to the Playground
The experience begins at the parking lot or sidewalk. Cracked paths, steep curbs, missing signage, and narrow gates create barriers before anyone touches the equipment. Paved, wide, gently sloped paths with clear markings are integral to the playground design, not a separate project.
Designing an inclusive play space is a significant undertaking, but breaking it into phases keeps the process manageable.
Assemble a diverse working group that includes parents of young children, disability advocates, an occupational therapist if available, an older adult, and a teenager. Involve them throughout the process, not just at a kickoff meeting.
Conduct site observations as described in Step 1. Document both barriers and existing strengths.
Draft a hub-and-spoke layout with zones defined by energy level and sensory character. Ensure clear, accessible paths from the central hub to every zone.
Select materials and surfacing based on long-term accessibility goals and local climate conditions. Require third-party test documentation for all critical safety parameters.
Integrate sensory elements and age-inclusive features using the graduated challenge and sensory distribution principles from Steps 5 and 6.
Write a maintenance manual with weekly, monthly, and annual tasks tied to specific materials. Identify who will perform them and how they'll be funded.
Open the space and listen. The first few months of use will reveal what's working and what needs adjustment. Create a feedback mechanism—a simple online form or a suggestion box—and respond to what you hear.
Throughout this process, reference the standards and resources mentioned: CPSC Handbook #325, ASTM F1487 and F1292, EN 1176, and NRPA maintenance guidelines. These provide objective benchmarks that keep decisions grounded in safety and performance rather than marketing claims.
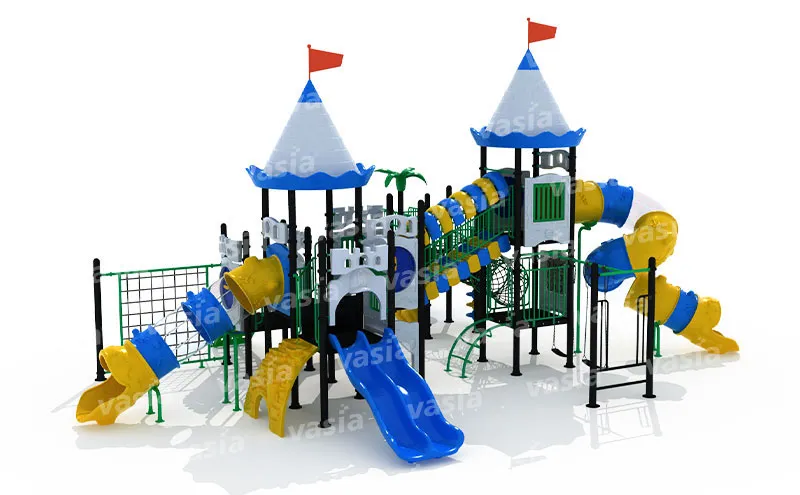
For those moving from concept to specification, it can be useful to see how the principles discussed here translate into actual equipment configurations. Review real-world project examples and configuration options. Understanding what has worked in similar settings—similar climate, similar demographics, similar budget constraints—can save months of trial and error.

Enter Your E-Mail


Yangwan Industrial Park, Qiaoxia, Yong Jia, Wenzhou, Zhejiang, China